Set up the game
Step 1: Open your test's page
Go to “Tests” and click “Use with class” next to the test you want to play.
Step 2: Choose “Live race”
It's in the “Live in class” group. The “Live game” page opens with the game settings.
Step 3: Pick the audience and how students play
Choose a level under “Who is it for?”. Under “How do students play?” choose “Each on their own”, “In teams” or “Groups on one device”. Teams can be “Balanced automatically” or students can choose.
Step 4: Choose a scene and a game mode
“Game scene” sets the race picture on your screen, and “How students answer” can turn the questions into a game. Both are offered for every level except “College”.
Step 5: Set the rules
Under “Who can do it” decide who may join. Under “Rules” set a “Time limit”, when students see right or wrong, “Show the leaderboard to students” and shuffling.
Step 6: Click “Open the game”
Your game screen opens full size with the waiting room. Put it on the projector.
Let students join
Step 1: Show the code
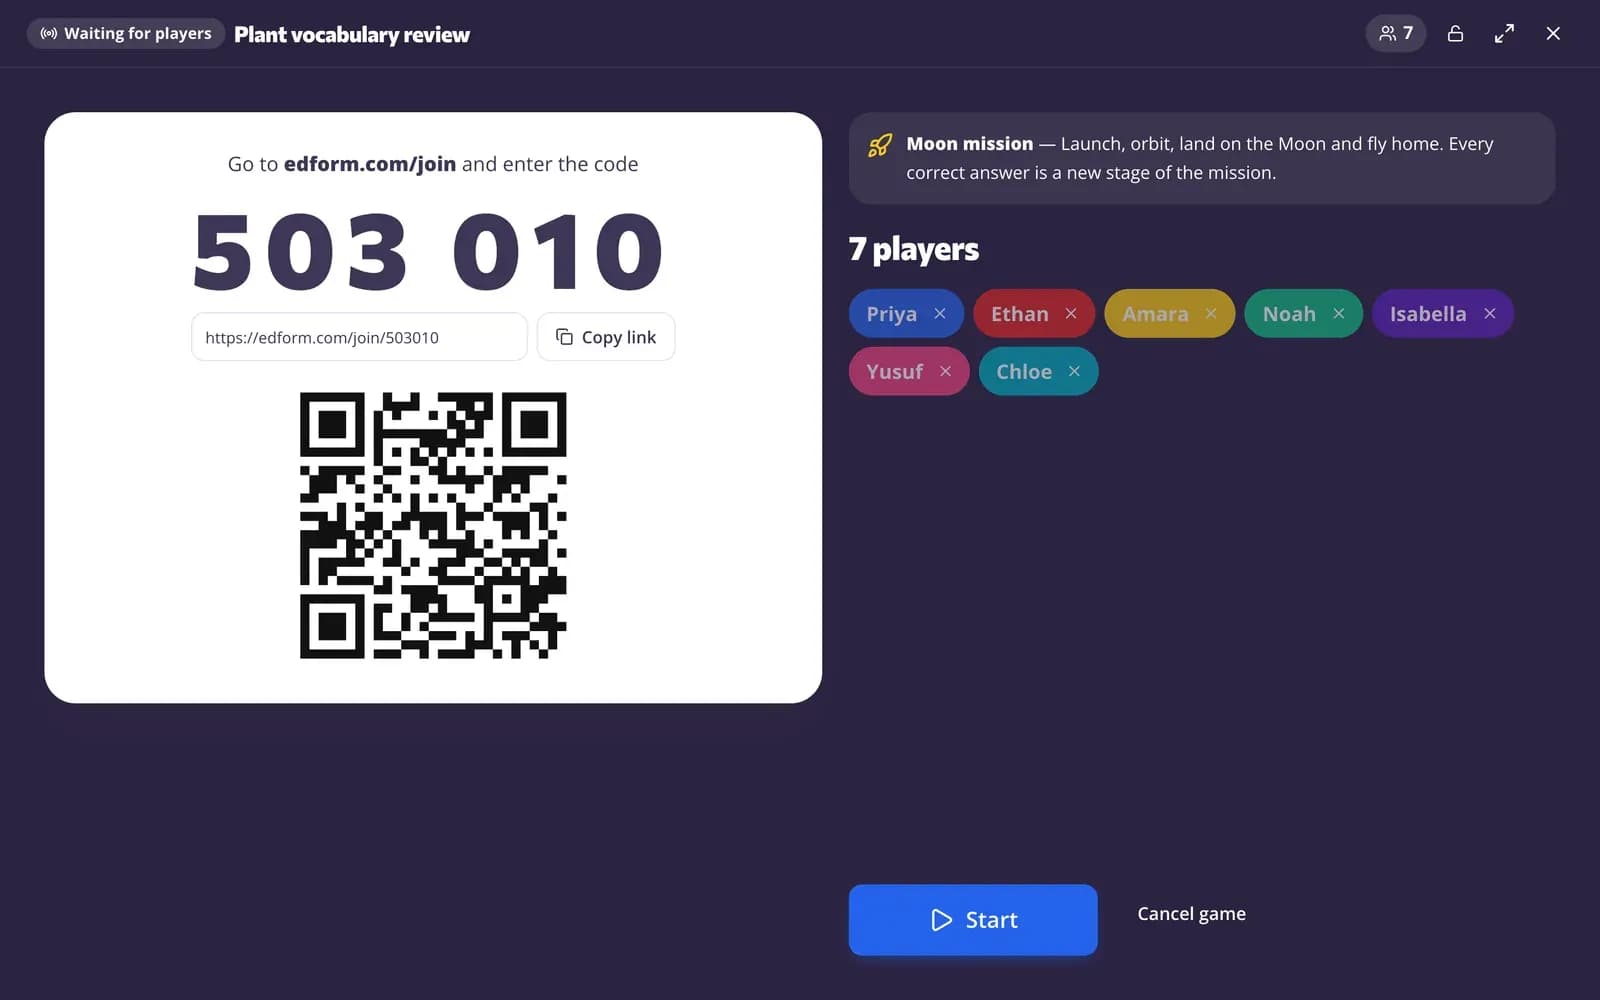
The waiting room shows the code, a QR code and a link (“Copy link”). Students open the join address, type the code and their name.
Step 2: Watch the class arrive
Names appear as students join. Use the remove button next to a name to remove someone, or the lock button to “Close to new players”.
Step 3: Click “Start”
“Start” works once at least one student has joined. Students who join later go straight to the questions.
Run the game
Step 1: Follow the live ranking
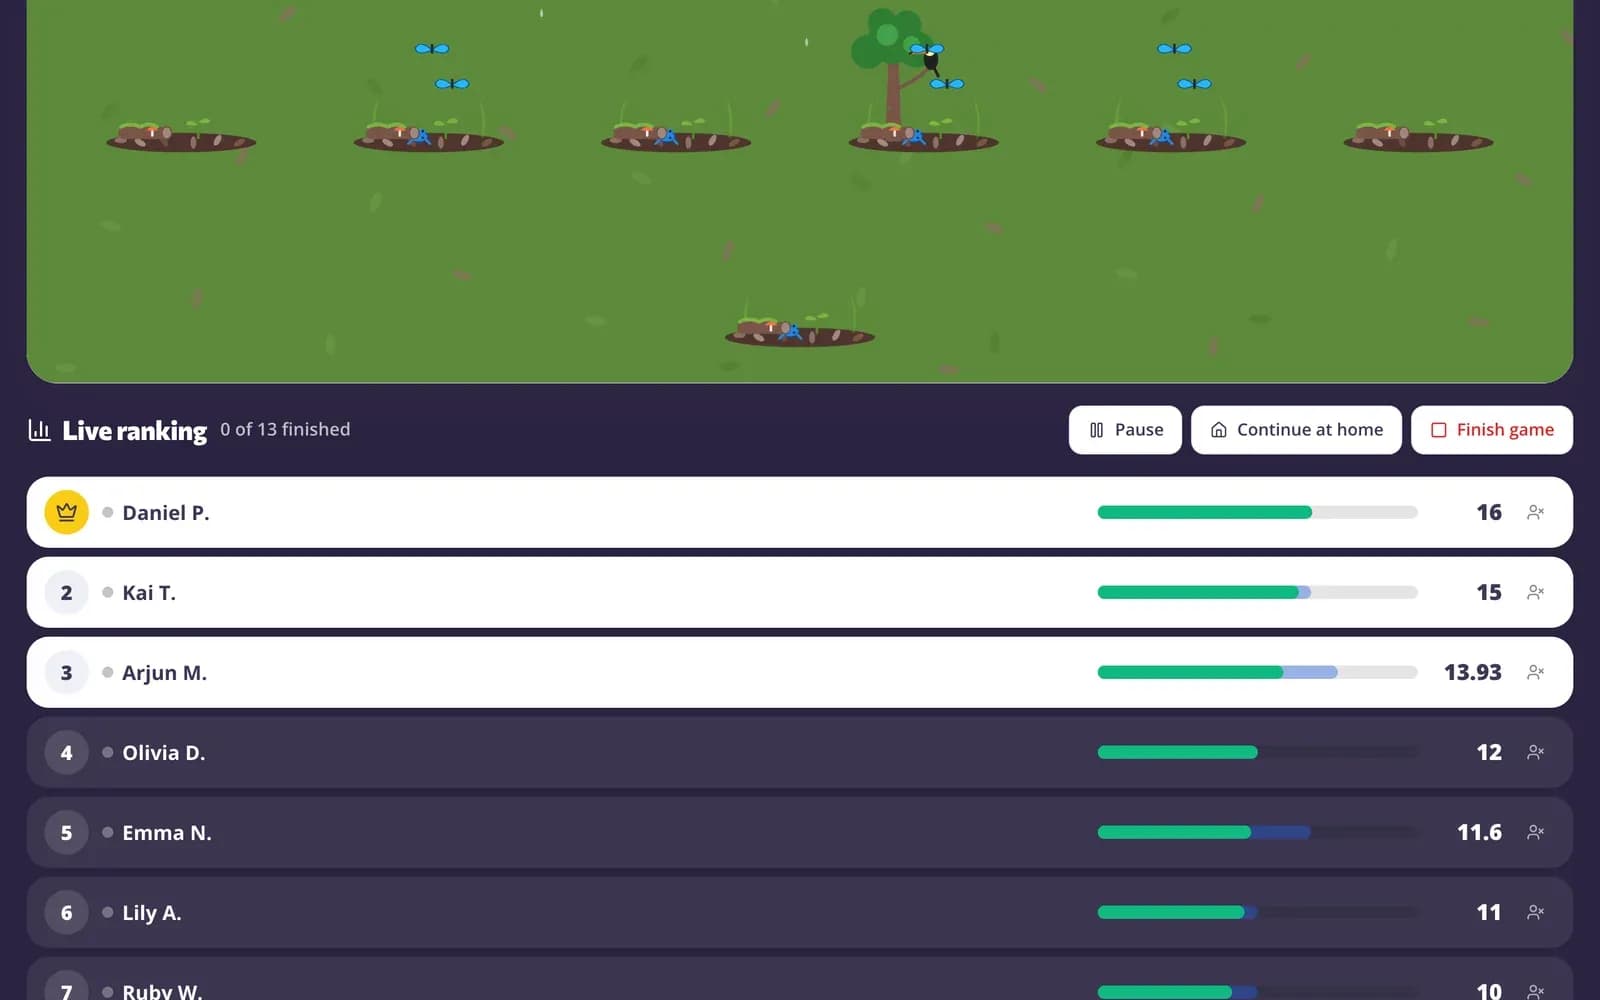
“Live ranking” shows how far each student is, how many questions they answered and who has finished. In team play you also see a team ranking.
Step 2: Pause when you need attention
Click “Pause” and students see that the game is paused. In a timed game their timers stop too. Click “Resume” to carry on.
Step 3: Show the code again
Click the code in the top bar to show the code, QR code and link again for latecomers.
End the game
Step 1: Click “Finish game”
Confirm, and everyone's answers are handed in. The podium shows the winners.
Step 2: Or let students finish at home
Lesson over before everyone is done? Click “Continue at home”, choose a “Deadline” and click “Make it homework”. Students keep their answers and continue with a homework code.
Step 3: Play again
Click “New game” to set up another round, or “Back to the test”.
Questions
Do students need an account to play?
No. With “Anyone with the code” students join with the code and their name. Choose “Signed-in students” or “One of my classes” if you want them to sign in.
Does everyone see the same question at the same time?
No. In a live race each student answers at their own pace and your screen shows the race. To show one question at a time with a timer and a leaderboard, choose “Live quiz game” instead.
How many teams can I have?
From 2 to 8. You can move a student to another team from your game screen.
What if my students don't have devices?
Use the team game instead: one screen, teams take turns and answer out loud.
Related
- Classroom gamesLive quiz, race, team and arcade review games
- Live quiz gameA timed quiz show with points, a leaderboard and a podium
- Game modesTurn any test into an arcade, word game, board or escape room.
- Team gamePlay a quiz on one screen with teams, a game board and no student devices.
- Game-based learningGames built from your questions that still count