Choose a video
Step 1: Press “New video lesson”
Choose “Videos” in the menu and press “New video lesson”, or press “Make a video lesson” on the dashboard. The “Choose a video” page opens.
Step 2: Pick where the video comes from
Use “Search YouTube” (with shortcuts to “Educational channels”), “Paste a link” for YouTube, Vimeo or a video file, “Upload” for an MP4 or WebM file up to 40 MB, or “Record” to record your screen or camera with your voice.
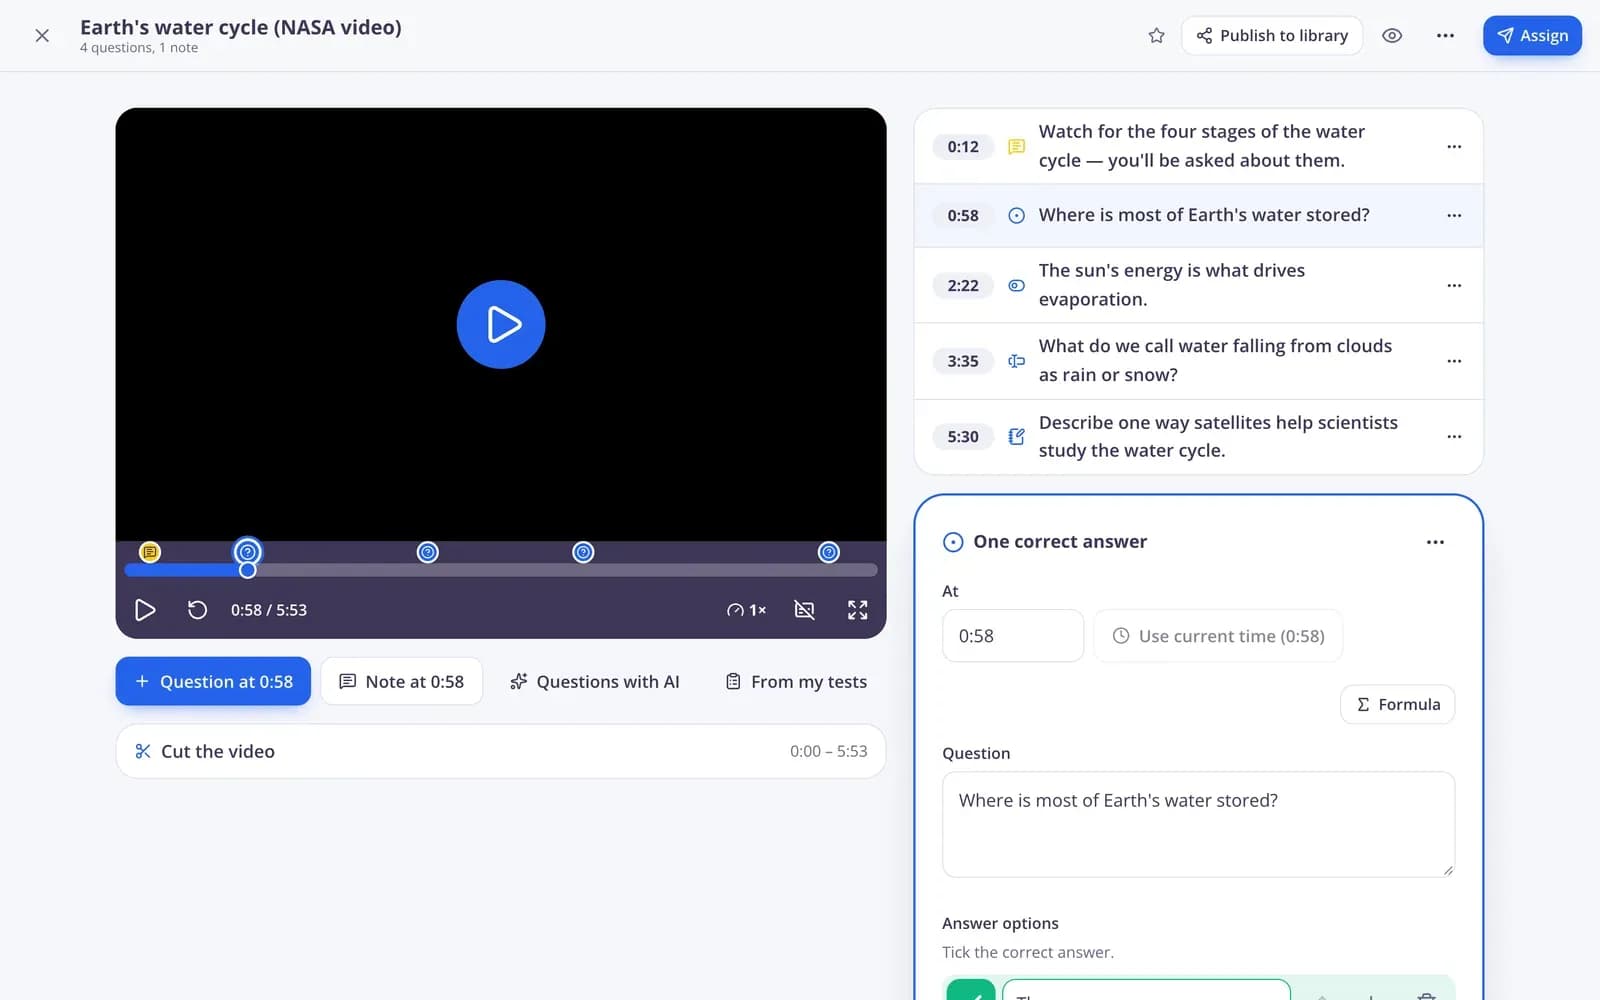
Add questions and notes
Step 1: Pause and add a question
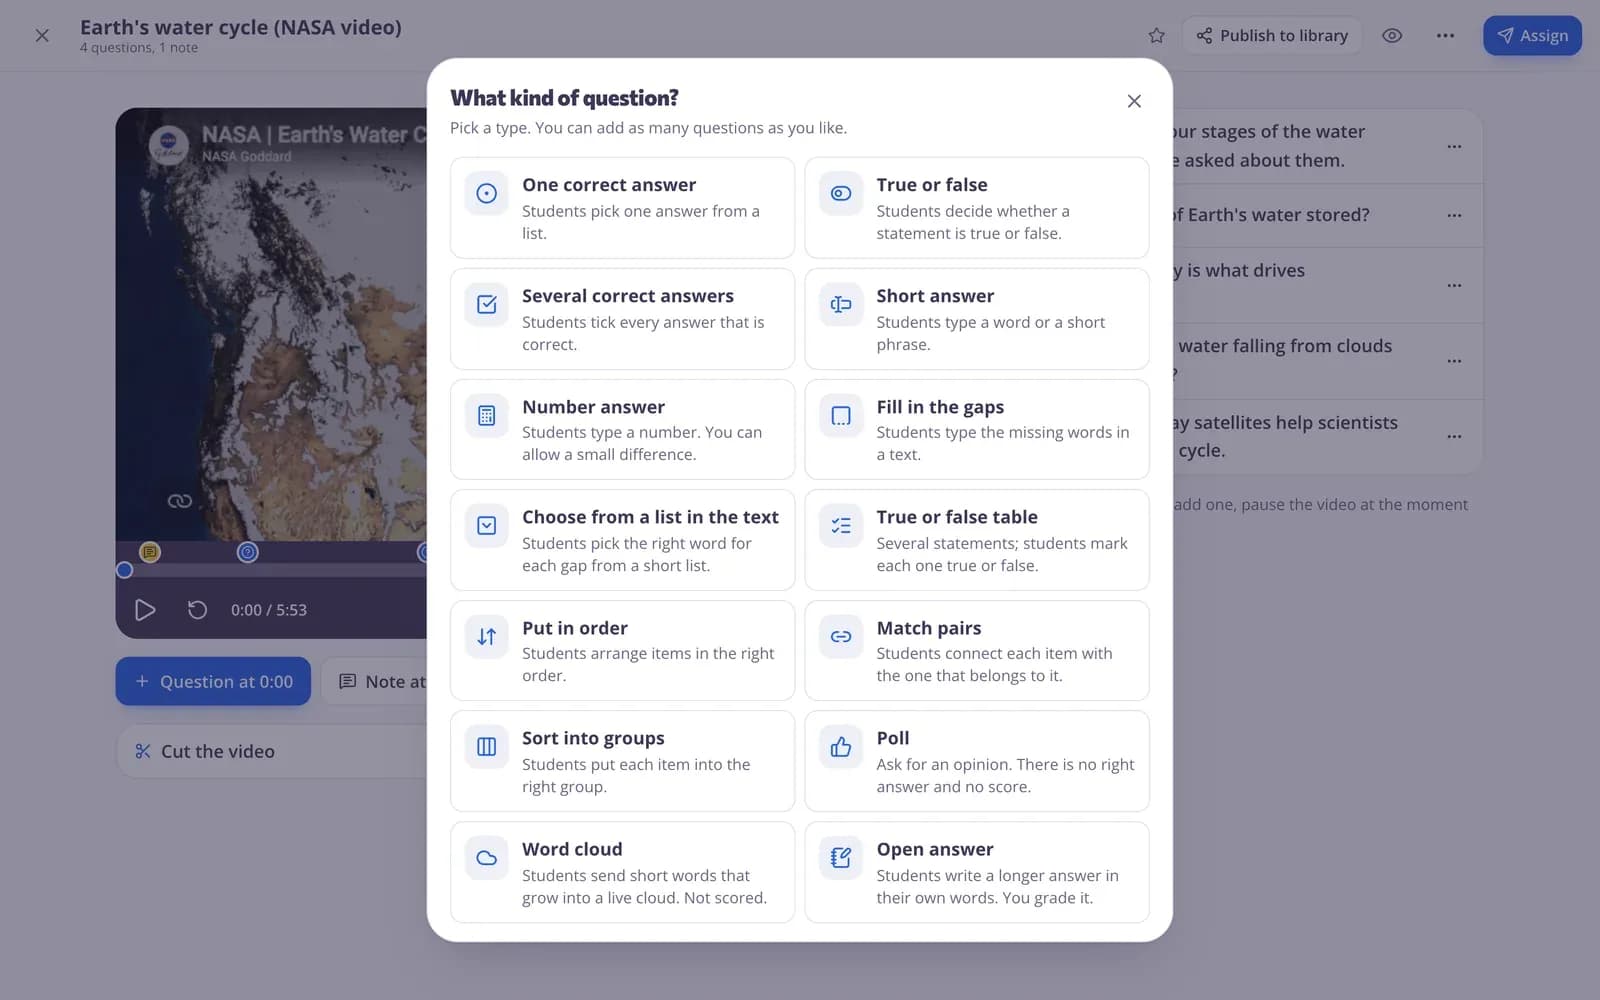
Play the video and pause where students should think. Press “Question at …” (it shows the current time), pick a question type, write it and press “Save question”.
Step 2: Add a note
Press “Note at …” and write “What students should notice”. You can add a picture and record a voice note of up to 3 minutes. Press “Save note”; the video waits while students read or listen.
Step 3: Let AI write questions
Press “Questions with AI”, add a “Focus” if you like, choose “How many questions” and the “Question types”, and press “Write questions”. AI reads the captions and places each question right after the part it asks about. If the video has no captions, describe what it's about.
Step 4: Reuse questions from a test
Press “Questions I already made” and pick a test, worksheet, lesson or video. Its questions are spread over the video. To move one, pause the video at the right moment and choose “Move to …” in the question's menu.
Step 5: Cut the video and set captions
Open “Cut the video” and set the “Start” and “End” with “Use current time”, so students only see that part. “Turn captions on for students” helps students read along.
Give it to students
Step 1: Preview it as a student
Choose “Preview as a student” to watch it the way students will. Nothing is saved.
Step 2: Press “Assign”
“Use video lesson” offers “Give as homework”, “Watch together in class” and “Preview as a student”. Its questions can also be played as a game.
Step 3: Give it as homework
Students join with a code or a link, no account needed. Keep “No skipping ahead” on so students can't jump past what they haven't watched. The results show how much of the video each student watched and their answers.
Step 4: Or watch it together in class
Play it on the projector. It stops by itself at each question, students answer on their devices, and you press “Continue the video”.
Questions
Can students skip ahead?
Not when “No skipping ahead” is on. Students can't jump past the part they haven't watched, but they can always go back.
Why won't a video play?
Some videos are private, removed or blocked from being shown on other websites. Choose another video, or use “Upload” for your own file.
How many questions can a video have?
Up to 100 questions and notes in total.
Can I change the video later?
Yes. In the “More” menu, choose “Change video”. Questions and notes keep their times, so check them afterwards.