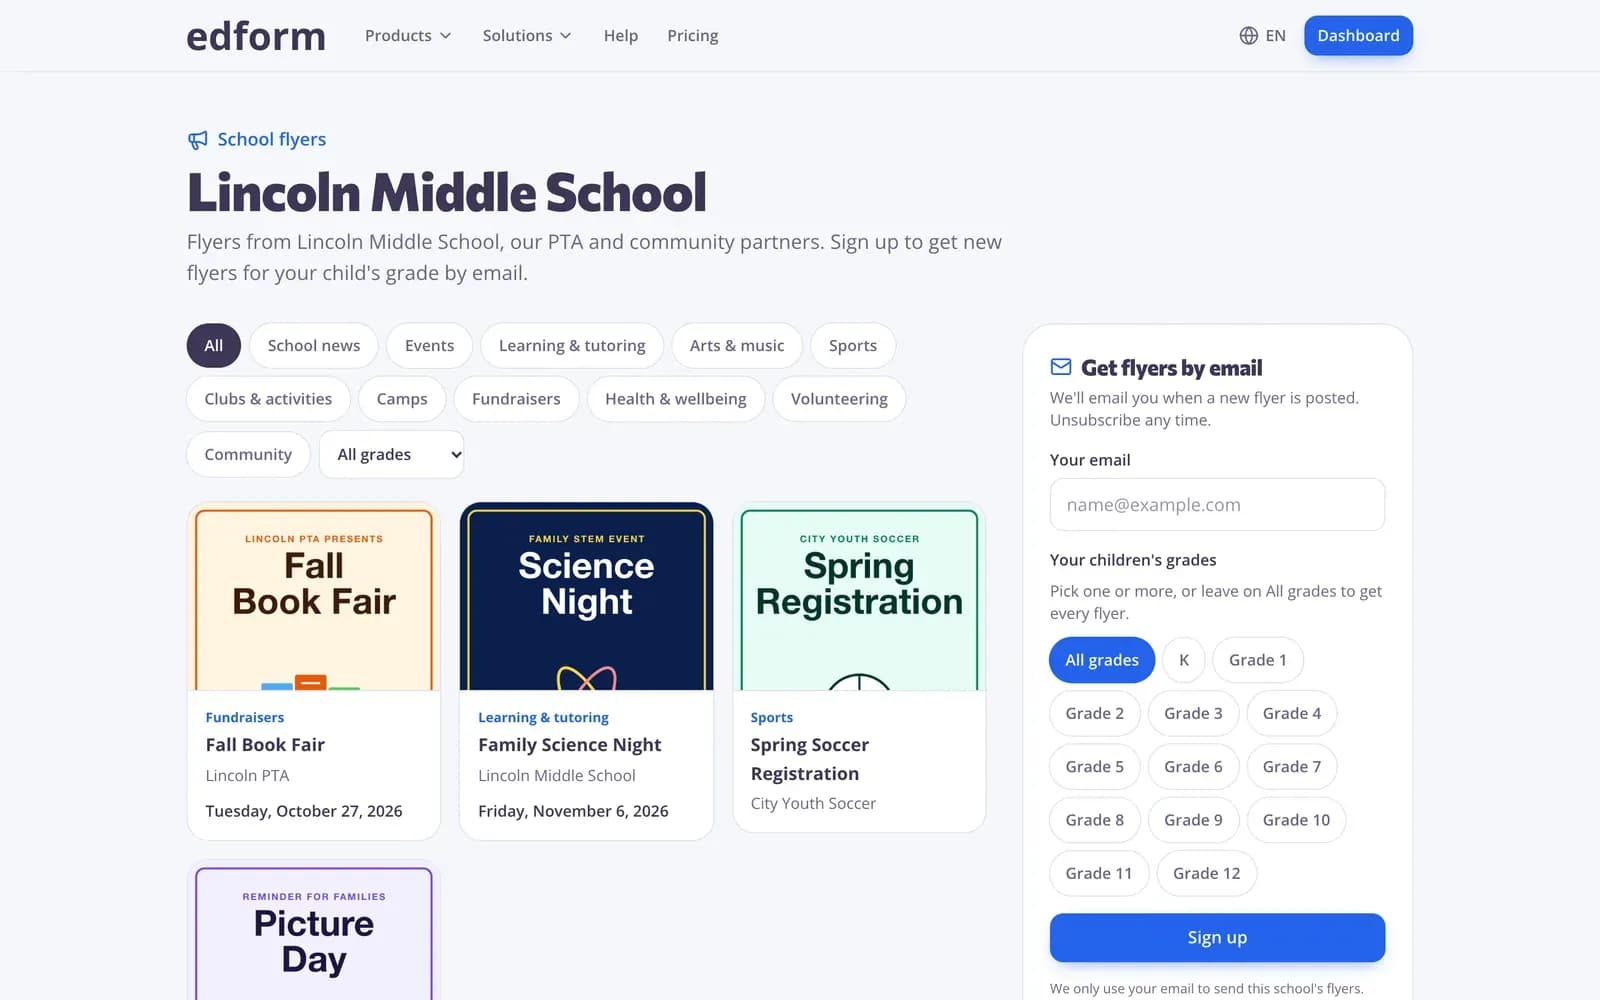
Set up your school's flyer board
Do this once per school. The person who creates the board manages it.
Step 1: Go to “Flyers”
In the sidebar, under “School & community”, click “Flyers”.
Step 2: Click “Set up a flyer board”
Choose your school or enter a new “School name”, pick the board's “Web address” and click “Create the board”.
Step 3: Check the settings
On the “Settings” tab add “A note for families” and your “School email domain”, so teachers with a school email post without approval. Choose whether to “Take flyers from community groups” and “Check staff flyers too”, then click “Save settings”.
Step 4: Tell families
The “Share” tab has the board link, a ready message for families, a button for your school website, a QR code and “Print a poster”. On the “Families” tab you can also paste parent emails you already have and click “Add families”.
Send a flyer
Step 1: Click “New flyer”
It's at the top of the Flyers page.
Step 2: Upload it and add the details
Click “Upload a flyer” (a JPG, PNG or PDF up to 25 MB, or skip it), then fill in “Title”, “From”, “Type of flyer” and “A few words for families”. Add a date, a place and up to three buttons if you like, then click “Next: choose schools”.
Step 3: Choose schools, grades and dates
Tick the schools under “Schools” or use “Find a school”. Pick the “Grades” and set “Show from” and “Show until”; a flyer can stay up for up to 180 days.
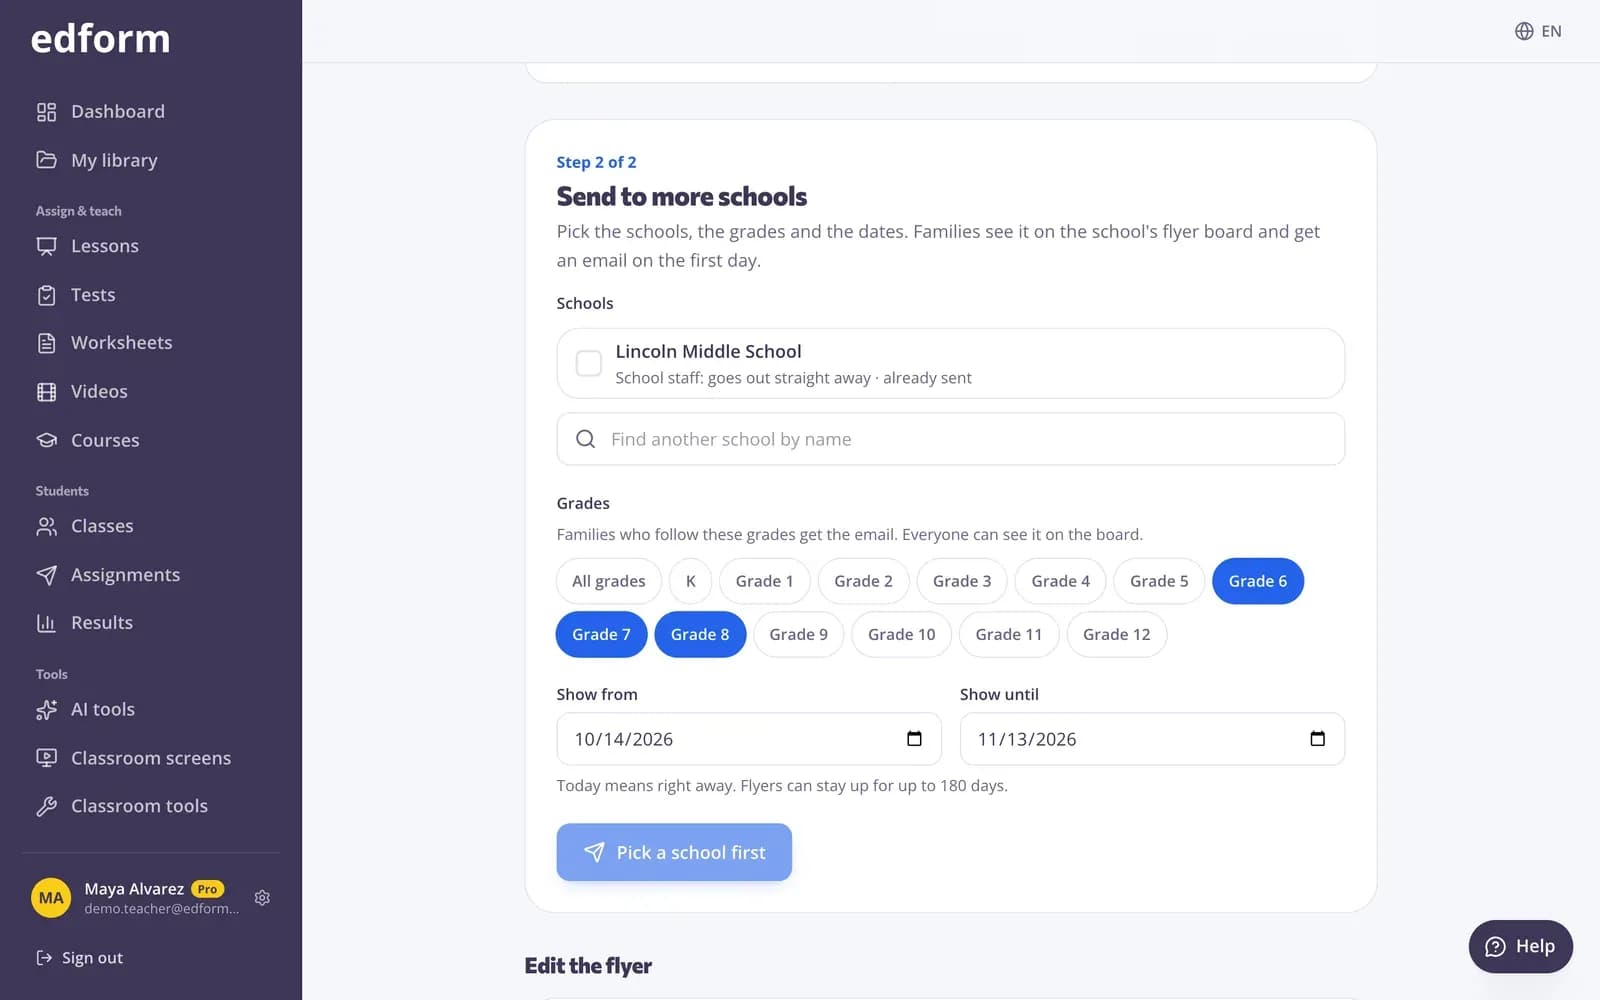
Step 4: Click “Send to 1 school”
The number on the button matches the schools you ticked. Flyers from school staff go up straight away. Other flyers wait until the school approves them, and you get an email when they do.
Step 5: Follow how it does
Under “Where it is” you see each board's status (“Up now”, “Scheduled”, “Waiting for approval” or “Declined”) with views, button clicks and emailed families. “Take down” removes it from a board.
Review flyers from community groups
Step 1: Open the “To review” tab
Open your board from the Flyers page. Flyers sent by community groups wait here.
Step 2: Approve or decline
Click “Approve” to put it on the board. “Decline” asks why; the sender gets your reason by email and can fix the flyer and send it again.
Step 3: Take a flyer down
Use “Take down” at any time. Families won't see it on the board any more, but emails already sent can't be recalled.
Questions
Do families need an app or an account?
No. Families enter their email on the board, pick their children's grades and confirm with the link in the email. Every email has a link to change grades or unsubscribe.
When do families get the email?
On the first day the flyer shows, to families who follow the flyer's grades. Everyone can see every flyer on the board.
Who counts as school staff?
Members of the school, and teachers with a confirmed email on the school email domain you set. Their flyers go up without approval unless you turn on “Check staff flyers too”.
What happens if I edit a flyer that was approved?
It goes back to that school for a quick check before families see the changes.