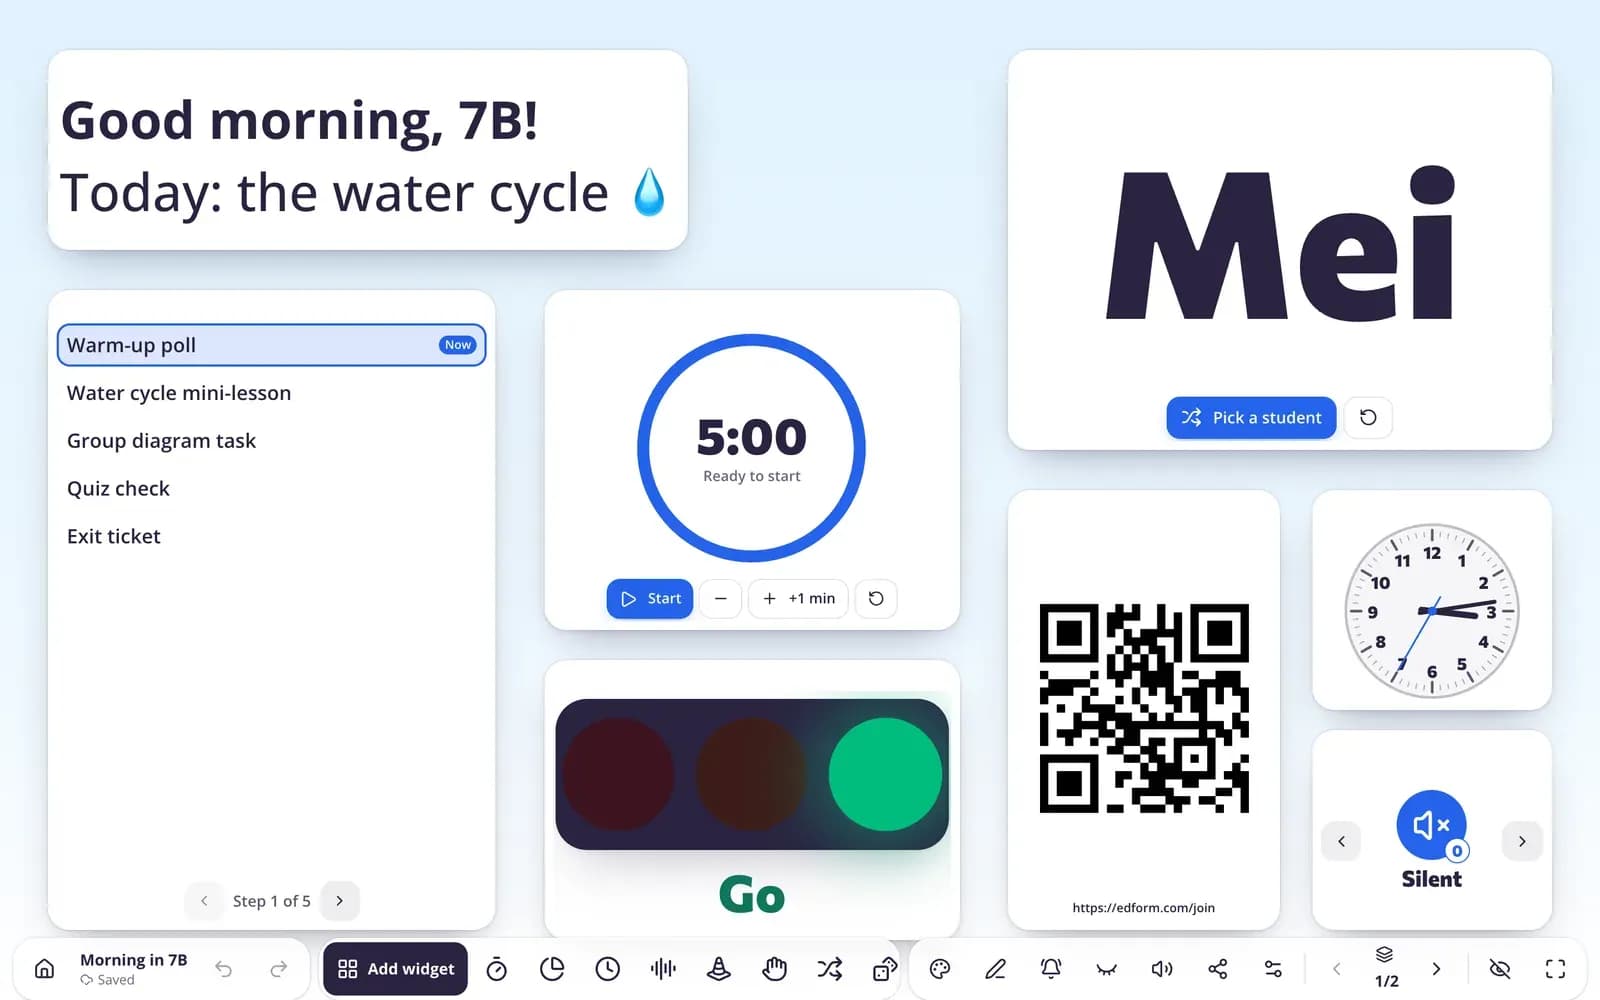
Create a screen set
Step 1: Go to “Screens”
In the sidebar, under “Tools”, click “Screens”.
Step 2: Start blank, from a template or with AI
Click “New screen” for an empty board, pick one of the ready-made screens under “Start from a template”, or use “Create a screen with AI”: describe your lesson, choose the “Age group” and click “Create my screens”.
Add widgets
Step 1: Click “Add widget”
It's in the bar at the bottom of the board. The “Add a widget” panel lists every widget by group, with a search box. Click one to add it, or drag it to the spot you want.
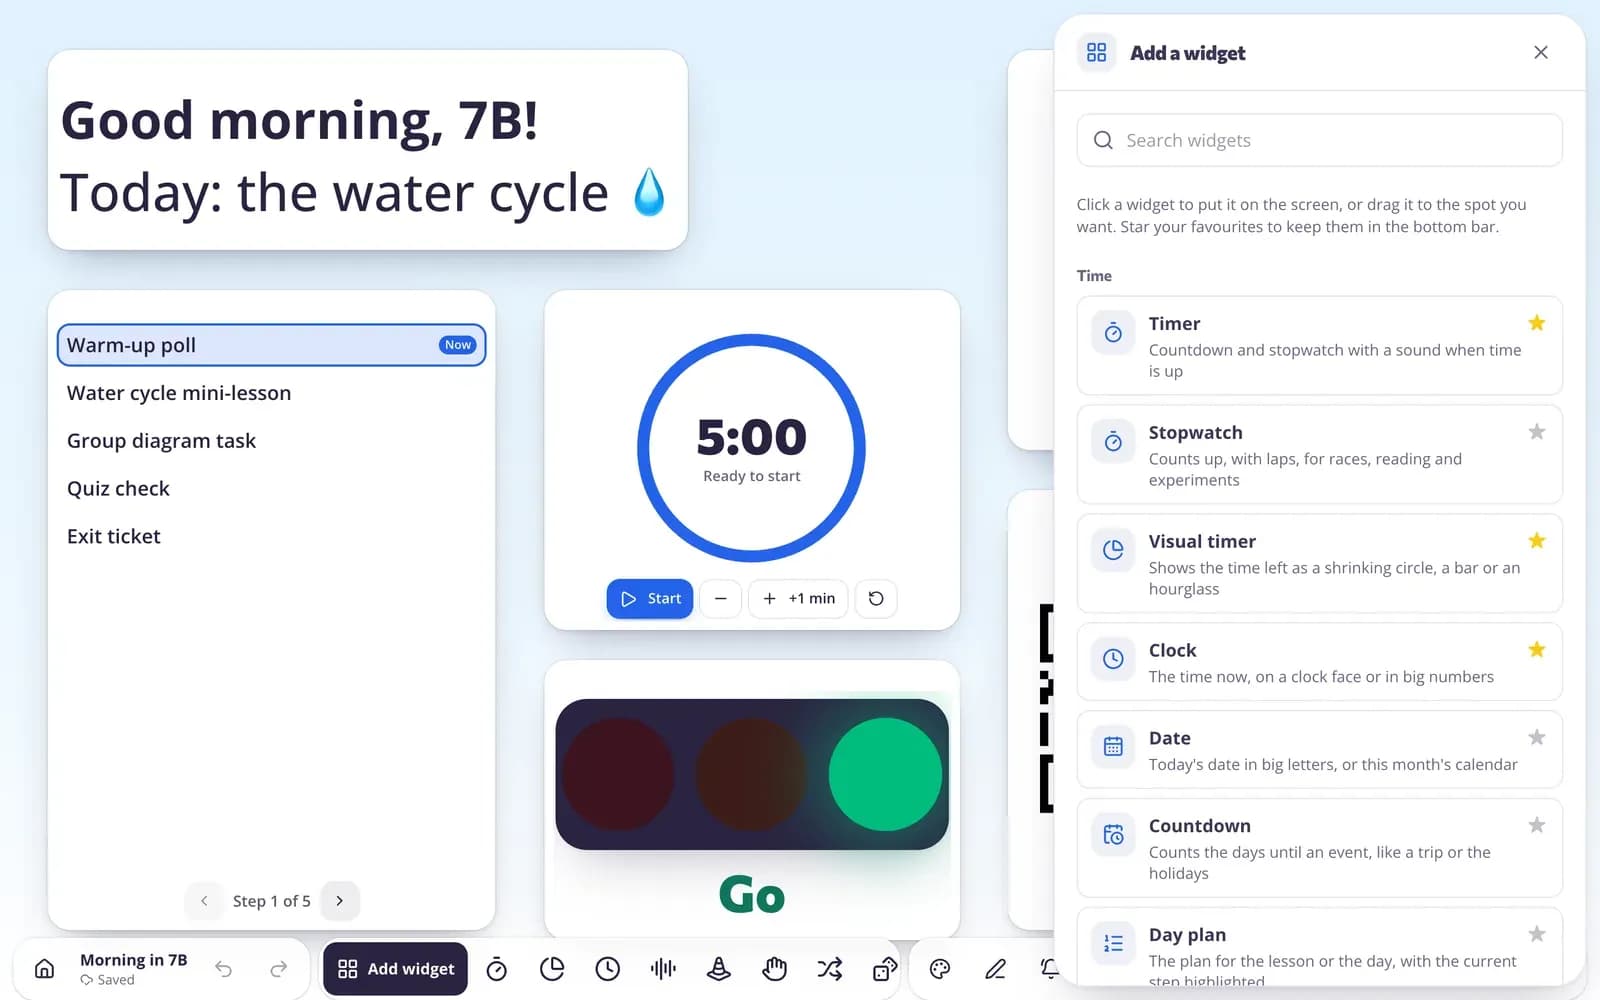
Step 2: Move and resize
Drag a widget by its top strip and resize it from the corner. Its menu has “Settings”, “Duplicate”, “Lock in place”, “Show on every screen” and “Spotlight”.
Step 3: Keep favourites in the bottom bar
In the widget panel, star a widget (“Add to the bottom bar”) to add it with one click next time.
Step 4: Use your class's names
Open “Screen set settings” and choose a “Class”. Name pickers, group makers, seating charts and scoreboards then use your students' names.
Step 5: Let students answer on their devices
Add a “Poll”, “Exit ticket” or “Word cloud”, choose “On students' devices” and click “Start”. Students scan the code or open the link; they don't need an account.
Change the look
Step 1: Open “Background and look”
Pick a drawn background, a colour, your own image, a video or a slideshow of backgrounds.
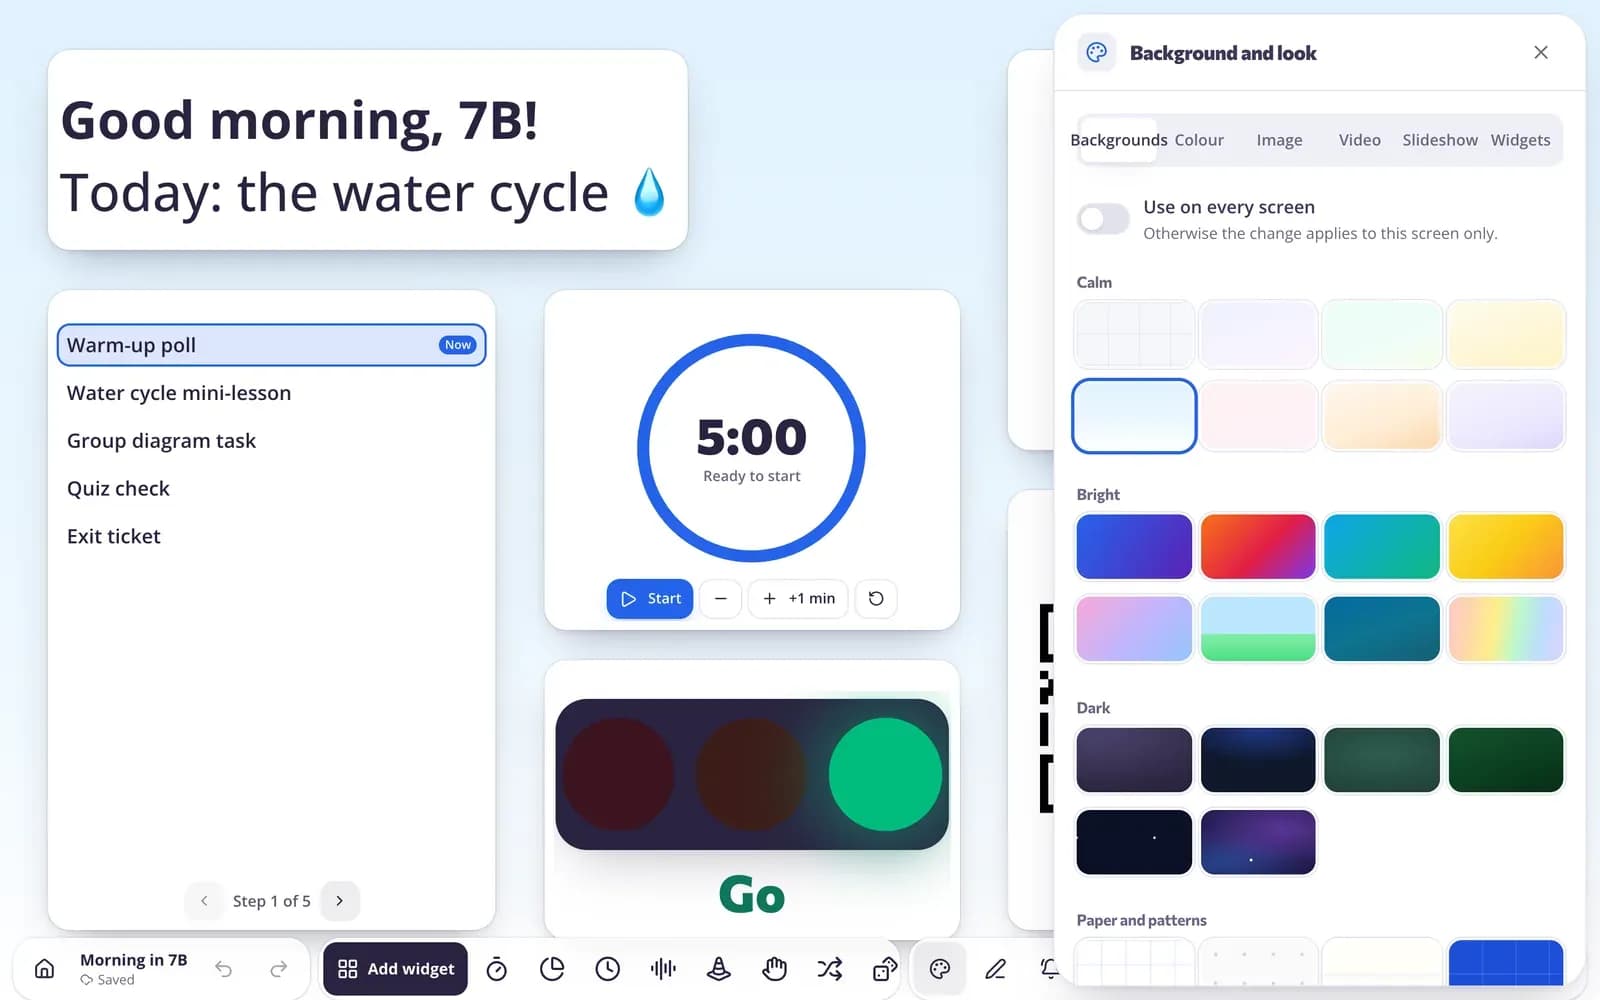
Step 2: Apply it to every screen
Turn on “Use on every screen”; otherwise the change applies to this screen only.
Step 3: Style your widgets
On the “Widgets” tab choose the “Widget style”, an “Accent colour” and a “Font” (including “Easy to read”). “Screen shape” keeps the same layout on every projector.
Teach with it
Step 1: Add more screens
“Add a screen” adds a screen after this one; “Next screen” and “Previous screen” move between them. “All screens” lets you rename, reorder, copy and add notes only you can see.
Step 2: Go full screen
Click “Full screen”, and “Hide the toolbar” to show only the widgets. Ctrl + Enter or a presentation clicker moves to the next screen.
Step 3: Get the class's attention
“Ring the bell” plays a short chime. “Hide the screen” blurs everything while you prepare the next part, and “Draw on the screen” lets you write on top.
Step 4: Open it first at the start of class
In “Screen set settings” turn on “Open first when I start class”. This set then opens straight away when you go to Screens.
Questions
Do I need to save my screens?
No. Changes save to your account automatically while you work.
Do students need accounts to answer a poll?
No. Students scan the QR code or open the link and answer on any phone, tablet or computer.
I deleted a screen set by mistake. Can I get it back?
Yes. Deleted screen sets are kept for 30 days under “Recently deleted” on the Screens page. Click “Restore”.
Can I use the same timer or name picker without a screen?
Yes. Every classroom tool also works on its own, full screen, from “Classroom tools” in the sidebar.
Related
- Classroom screenTimers, name pickers and more on the board
- Classroom screen templatesReady-made boards for every moment of the day
- Bell ringersWarm-up activities ready on the board when students walk in
- Classroom managementNoise meter, timers and routines on the board
- Classroom toolsUse the timer, name picker, noise meter and printable makers in class.