

Create the course
Step 1: Press “New course”
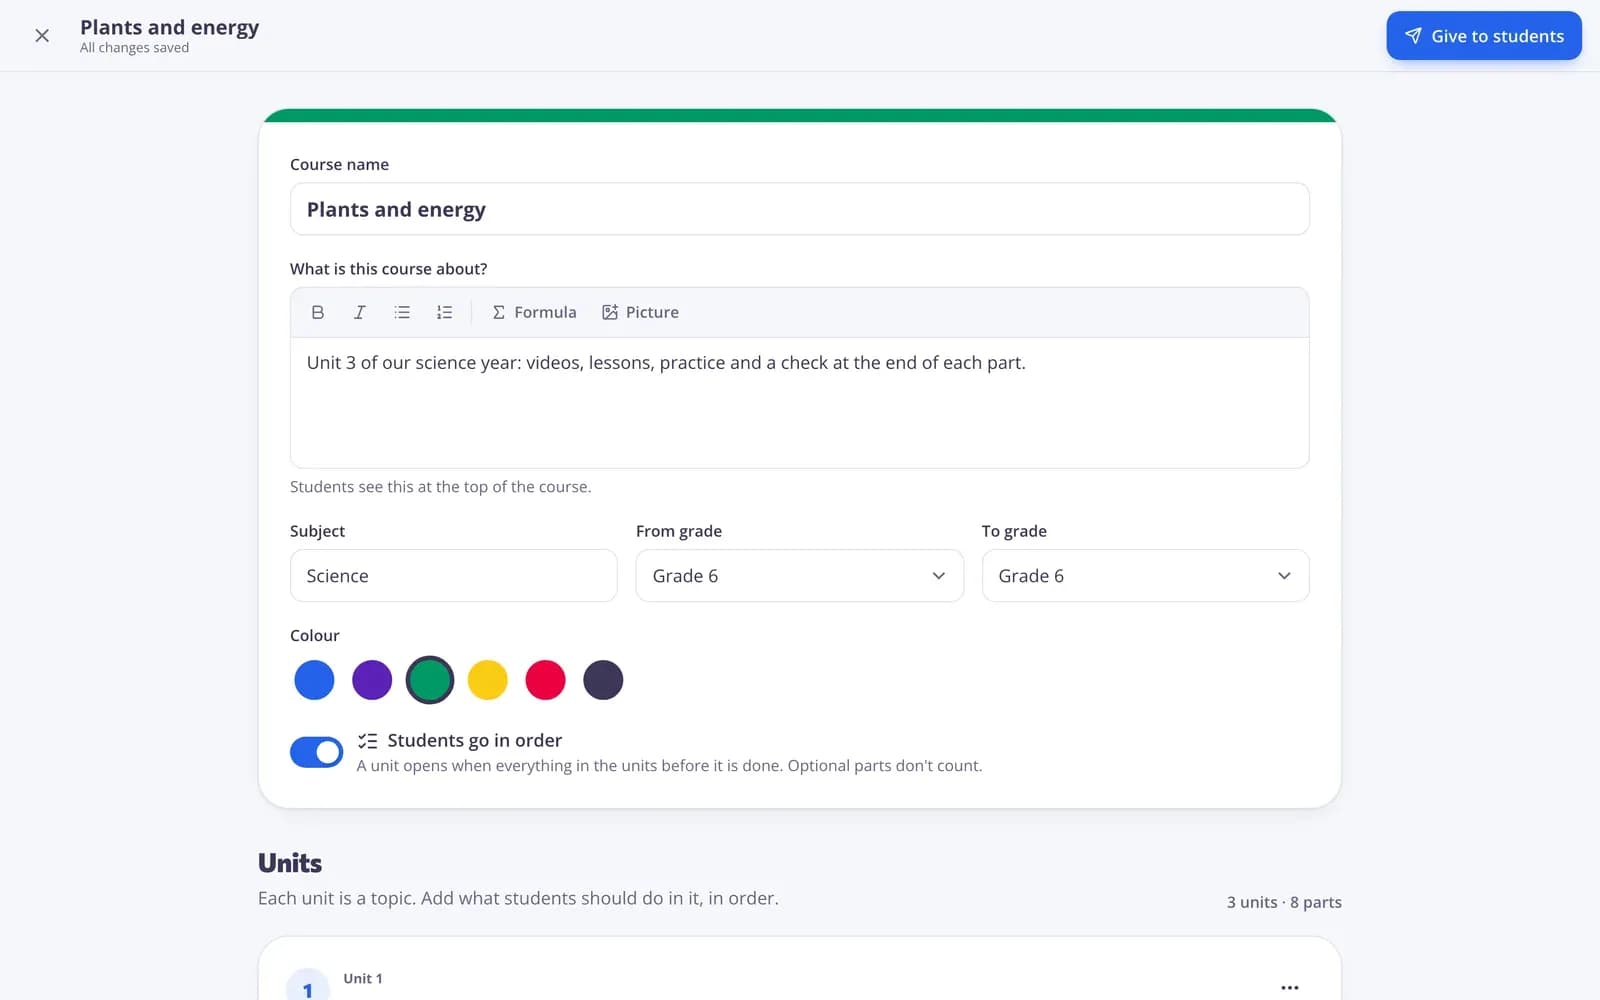
In the sidebar click “Courses” and press “New course”. The course builder opens.
Step 2: Describe it
Under “About this course”, fill in the “Course name”, “What is this course about?” (students see it at the top), the “Subject”, the grades and a “Colour”.
Step 3: Decide the order
Turn on “Students go in order” if a unit should open only when everything in the units before it is done. Optional parts don't count.
Add units and materials
Step 1: Add a unit
Press “Add a unit” for each topic or week. With “Add a note for students” you can say what the unit is about or what to do first.
Step 2: Add your materials
Press “Add from my library”, search or filter by type, tick one or more materials and press “Add”. Tests, worksheets, lessons, video lessons, AI materials and classroom screens all fit.
Step 3: Add a text, a link or a file
“Text” adds instructions or a reading, “Link” a web page or a YouTube video (it plays right in the course) and “File” a PDF, picture, audio or video.
Step 4: Arrange the parts
Move parts up and down, “Move to” another unit, “Make optional” for extra material that doesn't count in progress, or “Remove from course”. Removing a part keeps the material in your library and its results in Results.
Give it to students
Step 1: Press “Give to students”
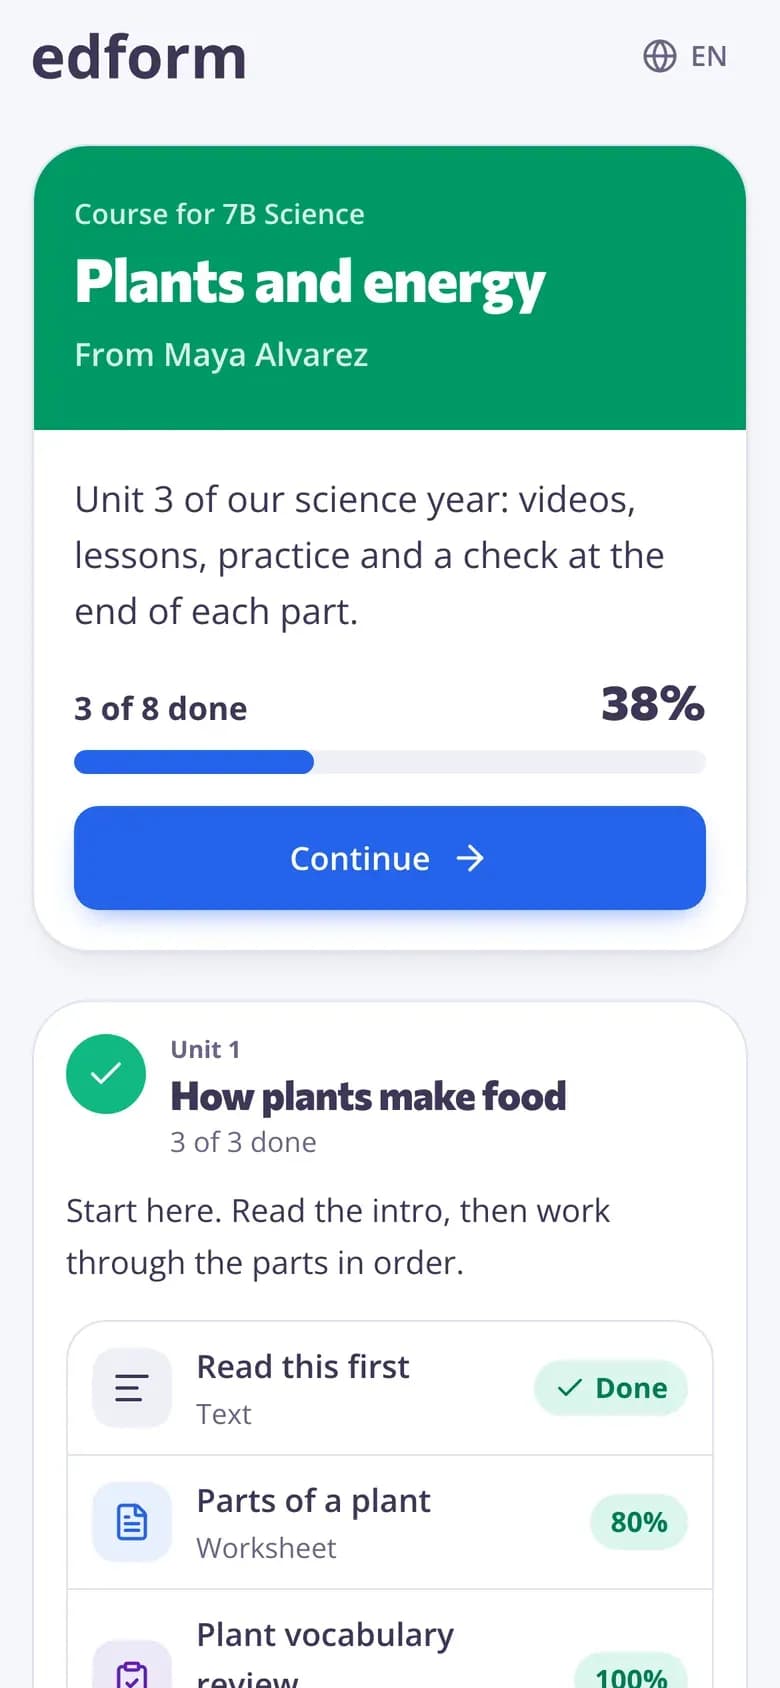
Choose a class and press “Give to this class”: its students find the course on their page when they sign in.
Step 2: Or use an open link
Press “Turn on the open link” for other groups, families or self-study. Under “Who can join” choose “Anyone with a name” (no account, progress is kept on their device) or “Only with an account”, then “Copy student link”.
Step 3: Close or reopen
“Close” lets students look at the course but not continue. You can “Reopen” it any time.
Follow progress
Step 1: Open the progress table
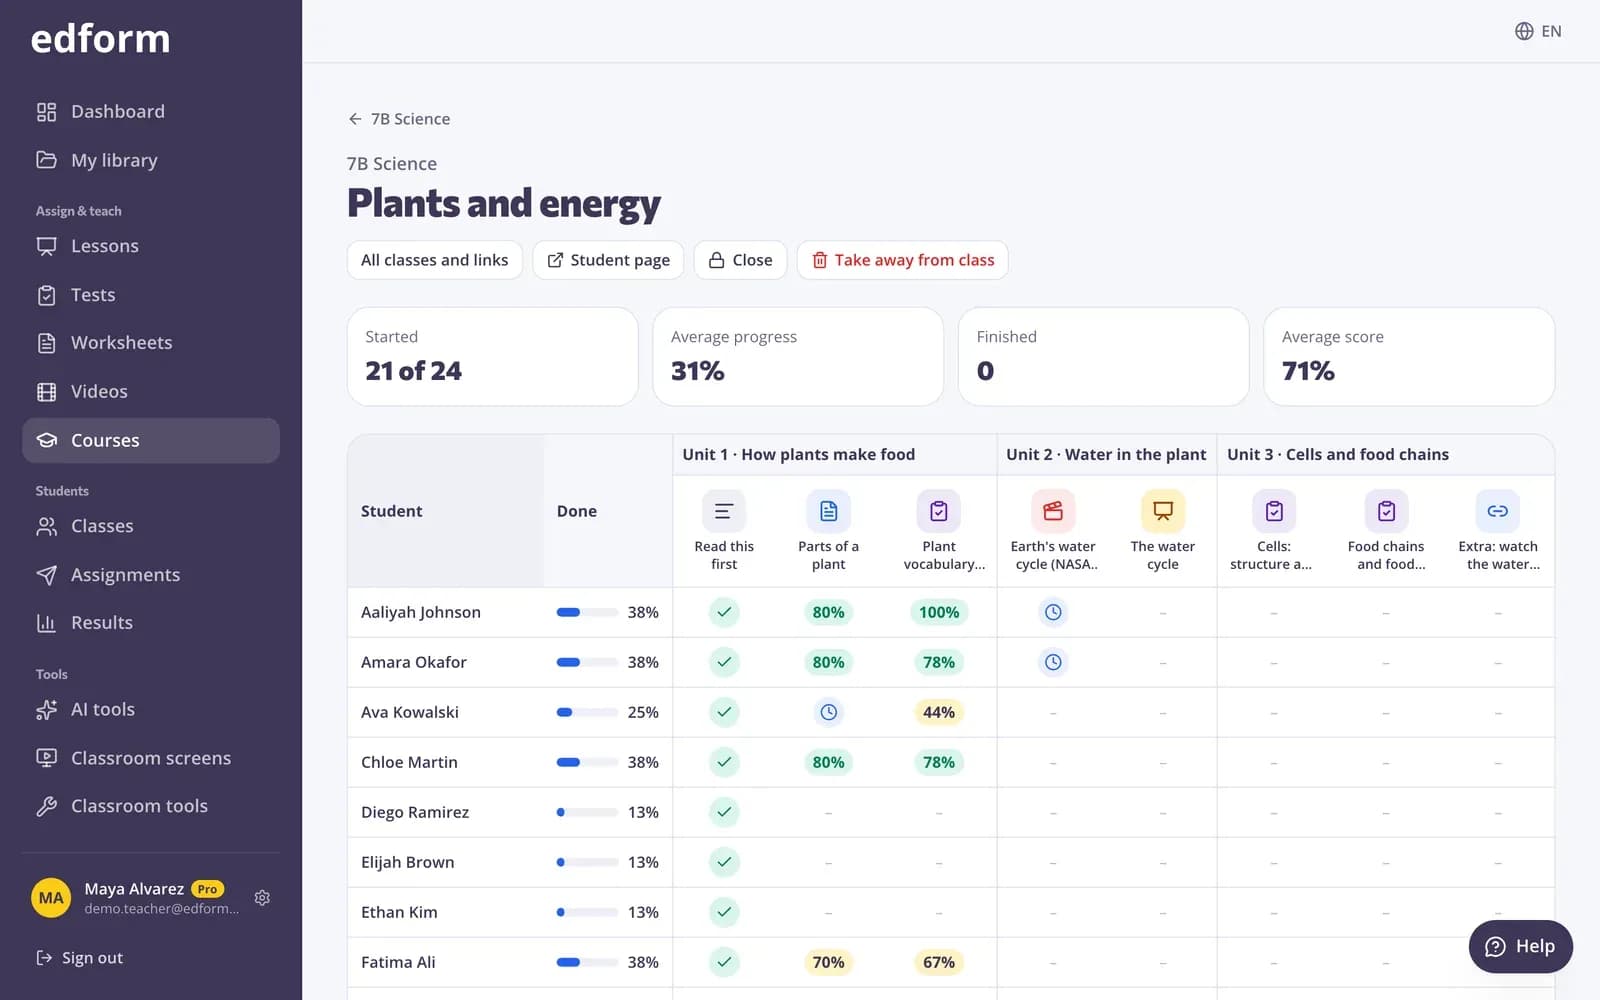
On the course's “Give to students” page, press “Progress” to see every student against every part: done, best score, started, or answers waiting for your grading. Choose one class or link, or all of them.
Step 2: Check the results
Every test, worksheet, lesson and video in a course is homework too, so scores and answers are also in Results. Click a test in the table to open its results.
Questions
Can I change a course after students started?
Yes. Add, move or remove parts at any time. Students see the changes next time they open the course, and their results stay.
What if I delete a material that is in a course?
The course shows it as deleted from your library and students don't see it any more.
Can I give the same course to several classes?
Yes. Give it to each class, and turn on the open link if you need one. The progress table shows all classes and links together or one at a time.
Related
- Online coursesUnits of your materials, given to a class or by one link
- Self-paced learningCourses and homework students work through at their own speed
- Assign homeworkGive a test as homework with a code, link or QR code and set the deadline.
- Results and gradebookSee every homework and live session in one place, a gradebook per class and each student's results.